In the Lab-46 we learned about MQTT protocol. In this lab we will learn how to use MQTT over WebSocket. So why do we need MQTT over WebSocket ?. It is to support MQTT on browser
WebSocket
WebSocket is web transport protocol. It is an upgrade from HTTP protocol. HTTP protocol is still in use but replaced by WebSocket in many applications. HTTP worked best for request and response type communication, where a browser request for data and server respond with data. A unidirectional communication. A polling mechanism was introduced in HTTP where client (browser) continuously poll server for data. Like client asking server if it has something to send. which was not very efficient. WebSocket solves this problem by creating bi-directional connection between client and server. Now client and server can send data asynchronously. This is very useful for web applications like Chat where client and sender can send/receive data
In order to support MQTT broker and client on web browser we need to run it over WebSocket. So in this lab instead of running MQTT client on Linux machine we will be running it on web browser. Similarly we will be using web based MQTT broker
Pre-requisite:
- Windows 10 laptop
- Paho-mqtt javascript library
Procedure:
Step-1. Download Paho-mqtt javascript library
- Go to this link and download zip file to you pc
- Unzip the file. There will be mqtt-ws31.js file under ‘paho.mqtt.javascript-master\src’
Step-2. Open a notepad and paste below code. Save it as index.html file. This code simulates MQTT client over WebSocket. It will create connection to MQTT broker and publish a message
In this lab we will be using MQTT cloud broker at ‘broker.mqttdashboard.com’
invoke paho-mqtt client library. Give the full path where mqtt-ws31.js file is located
Below code creates connection to broker ‘broker.mqttdashboard.com’ on port 8000 and provide a client-id
// Create a client instance
 client = new Paho.MQTT.Client("broker.mqttdashboard.com", 8000, "clientId");
Add your topic name here
message.destinationName = "divinelife/topic/1";
Below complete code
<!DOCTYPE html> <html> <head> <meta charset="utf-8" /> <title>MQTT over Websocket</title> </head> <body>Message published to Cloud MQTT broker// Create a client instance client = new Paho.MQTT.Client("broker.mqttdashboard.com", 8000, "clientId"); // set callback handlers client.onConnectionLost = onConnectionLost; // connect the client client.connect({ onSuccess: onConnect }); // called when the client connects function onConnect() { // Once a connection has been made, make a subscription and send a message. console.log("onConnect"); var msg = "Hello Cloud MQTT from DivineLife" message = new Paho.MQTT.Message(msg); message.destinationName = "divinelife/topic/1"; client.send(message); } // called when the client loses its connection function onConnectionLost(responseObject) { if (responseObject.errorCode !== 0) { console.log("onConnectionLost:" + responseObject.errorMessage); } } </body> </html>
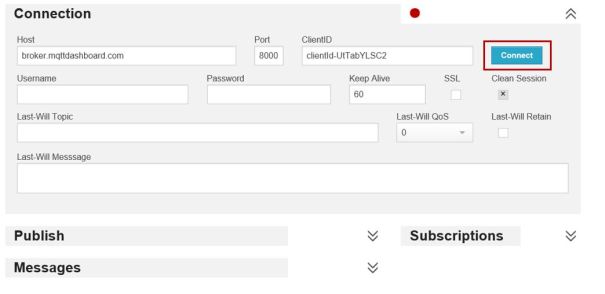
Step-3. Go to this link to access web based broker
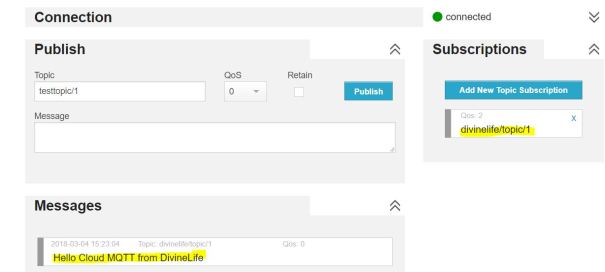
Click on Connect. leave other fields as it is
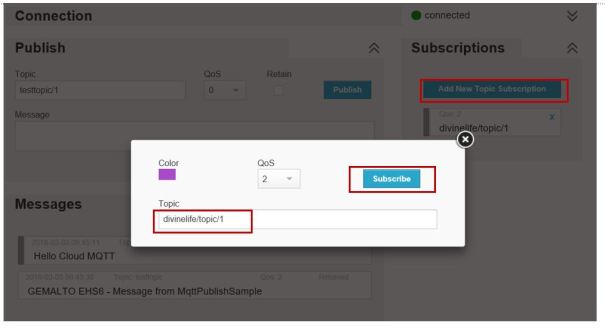
Click on ‘Add New Topic Subscription’ under Subscriptions to subscribe to a topic. Enter topic name , this is the same topic we will be publishing using javascript program. click on ‘Subscribe’.
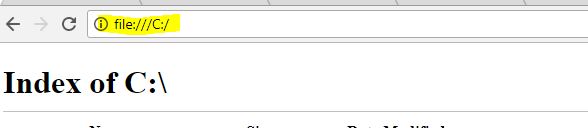
Step-4. Execute javascript program we created in step-2. I am running it in Google Chrome. Open a new tab and type ‘file:///C:/’ , navigate to your program ‘index.html’ and click on it. It will execute program and send message to broker.
Note: If you need to see console debug messages or debug script, press F12 on Chrome browser and click on Console tab
Check message in broker, you should see below message under Messages
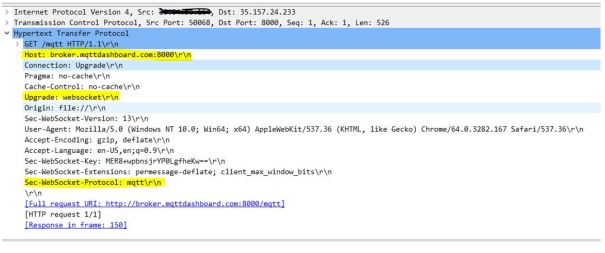
Let’s see what’s happening under the hood
First browser asked server to upgrade to WebSocket and use mqtt as sub-protocol (Sec-WebSocket-Protocol). This is a way of telling the server to use WebSocket protocol instead of HTTP
Server respond back and agree to upgrade to WebSocket protocol and sub-protocol as mqtt

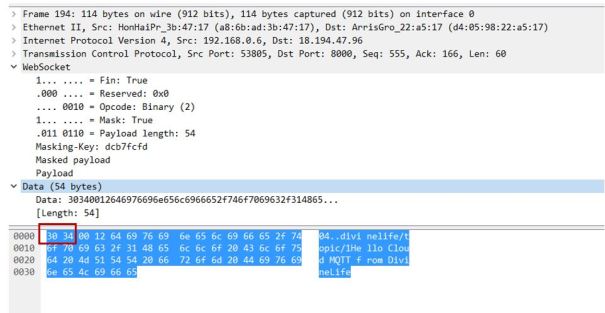
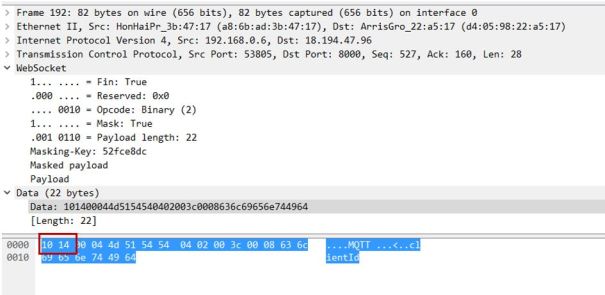
After initial handshake, browser sends MQTT packet encapsulated in WebSocket.
CONNECT message from client
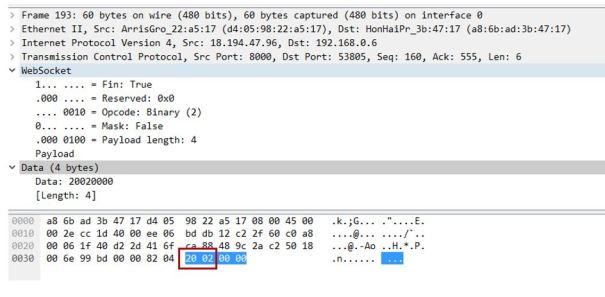
CONNACK from broker
PUBLISH from client