In this lab I will demonstrate how to deploy Openstack using Devstack. This is Devstack’s mission statement:
DevStack's mission is to provide and maintain tools used for the installation
of the central OpenStack services from source (git repository master, or
specific branches) suitable for development and operational testing. It also
demonstrates and documents examples of configuring and running services as
well as command line client usage.
I am using my laptop and Virtualbox. I have downloaded centos 7 image from this link and brought up fresh virtual machine in Virtualbox. Initial instructions for this lab can be found in this link.
- Create an user. Devstack should be run as non-root user
$su - //login as root
$adduser devstack
$passwd devstack //add password for user devstack
$yum install -y sudo
$echo "devstack ALL=(ALL) NOPASSWD: ALL" >> /etc/sudoers
- Logout and login as newly created user. I reboot the VM and login as ‘devstack’
- Clone devstack from github. I am cloning Mitaka from stable branch. This will create devstack directory for you
$sudo yum install -y git
$git clone -b stable/mitaka https://github.com/openstack-dev/devstack.git
$cd devstack
- You will need a local resource file named ‘local.conf’. This file is similar to answer file we define in packstack. Below my local.conf file (I downloaded it from internet and made some changes). Keep this file in devstack directory
[[local|localrc]]
RECLONE=True

HORIZON_BRANCH=stable/mitaka
KEYSTONE_BRANCH=stable/mitaka
NOVA_BRANCH=stable/mitaka
NEUTRON_BRANCH=stable/mitaka

#-----------------------------
# Common configurations
#-----------------------------
disable_service cinder c-sch c-api c-vol
disable_service tempest
disable_service heat h-api h-api-cfn h-api-cw h-eng

KEYSTONE_TOKEN_FORMAT=UUID
PRIVATE_NETWORK_NAME=net1
PUBLIC_NETWORK_NAME=ext_net

#-----------------------------
# Neutron
#-----------------------------
disable_service n-net
enable_service neutron q-svc q-agt
enable_service q-dhcp
enable_service q-l3
enable_service q-meta
#enable_service q-lbaas
#enable_service q-lbaasv2
#enable_service q-fwaas
#enable_service q-vpn
#enable_service q-qos
#enable_service q-flavors
# murano devstack enables q-metering by default
disable_service q-metering

Q_PLUGIN=ml2
Q_AGENT=openvswitch
#Q_USE_DEBUG_COMMAND=True
if [ "$Q_PLUGIN" = "ml2" ]; then
  #Q_ML2_TENANT_NETWORK_TYPE=gre
  Q_ML2_TENANT_NETWORK_TYPE=vxlan
  :
fi

#-----------------------------
# Devstack configurations
#-----------------------------
LOGDIR=$DEST/logs
SCREEN_LOGDIR=$LOGDIR
LOGFILE=$LOGDIR/devstack.log
LOGDAYS=1

HOST_IP=10.0.2.15
ADMIN_PASSWORD=devstack
MYSQL_PASSWORD=devstack
RABBIT_PASSWORD=devstack
SERVICE_PASSWORD=devstack
SERVICE_TOKEN=devstack
- Start deployment, under devstack directory execute stack.sh script
$./stack.sh
- After deployment completed you will see this message
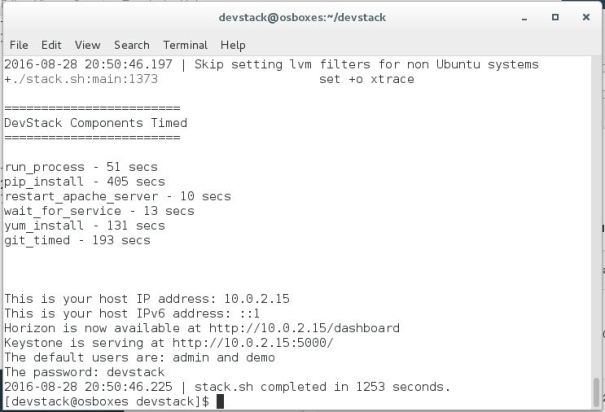
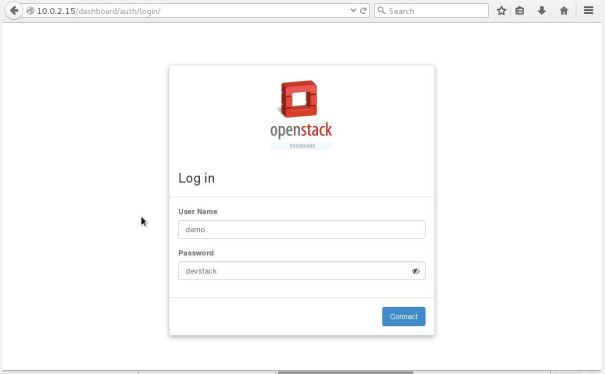
- Launch a browser and paste url from above picture ‘http://10.0.2.15/dashboard’ for Horizon gui, Login:demo and password:devstack
- In order to use command line API source resource file to set environment variables. Source openrc resource file under devstack directory
$. openrc
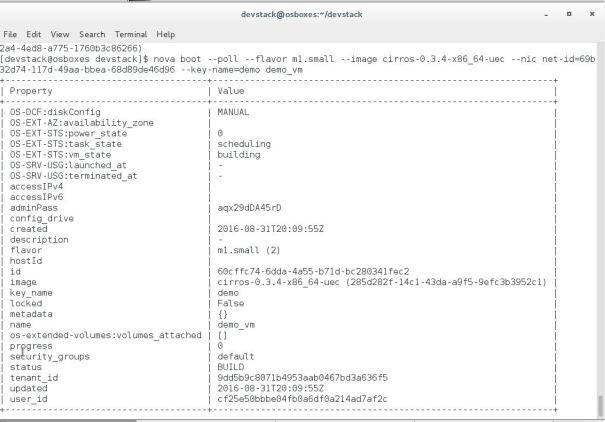
- Devstack comes up with preprovisioned router,private network and subnet. I deleted private network and created my own private cloud using these command and spun a VM
//create private network & subnet
neutron net-create demo
neutron subnet-create --name demo_subnet \
   --dns-nameserver 8.8.8.8 demo 192.168.11.0/24

//create private network interface to router
neutron router-gateway-set router1 ext_net
neutron router-interface-add router1 demo_subnet

ssh-keygen -f demo -t rsa -b 2048 -N ''
nova keypair-add --pub-key demo.pub demo

//security group rule
neutron security-group-rule-create --protocol icmp default
neutron security-group-rule-create --protocol tcp \
  --port-range-min 22 --port-range-max 22 default

openstack flavor list //get flavor list for vm
openstack image list  //get image list  for vm
openstack net list   //get id for private network

//Boot a VM
nova boot --poll --flavor m2.nano --image cirros \
   --nic net-id=535659e3-2c4d-4ccd-a05f-6b03cd29e9b0 --key-name demo demo_vm

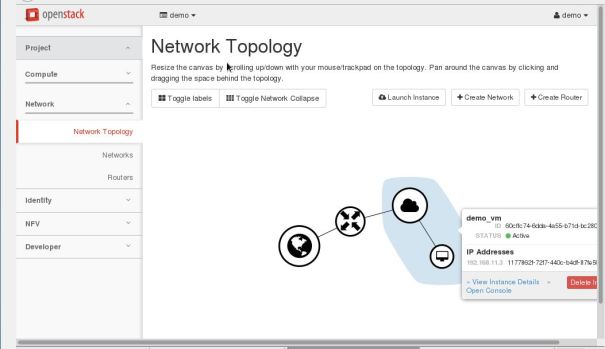
- After VM boot up successfully, check network topology in the Horizon gui. The shaded are is our private cloud
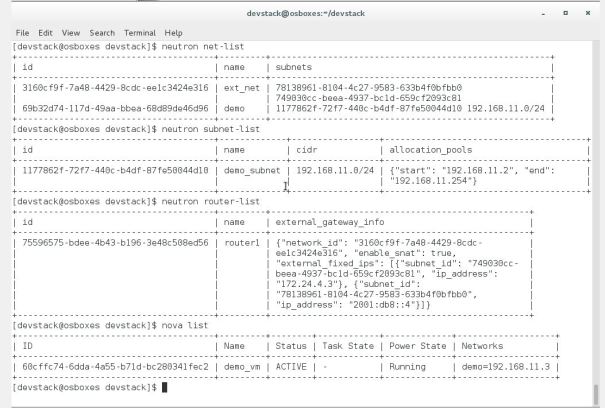
- Below output from cli