For a long time I wanted to deploy Openstack in a Virtual box this became true after I purchased a new laptop with sufficient RAM
Precondition:
My laptop has Windows 7 64-bit, 16 GB RAM.
Download CentOS 7 virtual box image from this link. I downloaded 7.1-1511. Images come with usrname:osboxes, password:osboxes.org and root passward:oxboxes.org
Download virtualBox from this link.Start VirtualBox with CentOS image, I have given it 4 GB RAM
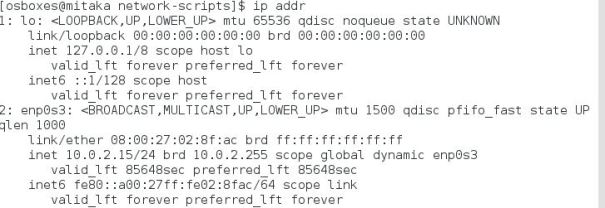
I have not changed network setting in VirtualBox, it is using default NAT mode. My VM came up with interface enp0s3 and IP address 10.0.2.15.
Make sure you can ping internet using domain name.
Follow below steps to prepare machine for Openstack deployment
Install yum-utils on both nodes
$yum install -y yum-utils
Set SELINUX in permissive mode on both nodes , edit file /etc/selinux/config
SELINUX=permissive
Disable Network Manager on both nodes
$systemctl disable NetworkManager
Disable firewall on both nodes
$systemctl disable firewalld
Perform update on both nodes
$yum update -y
reboot VM
$reboot
Set hostname
$hostnamectl set-hostname mitaka
Edit /etc/hosts with fqdn
[root@controller ~]# cat /etc/hosts
127.0.0.1   localhost localhost.localdomain localhost4 localhost4.localdomain4
::1         localhost localhost.localdomain localhost6 localhost6.localdomain6
10.0.2.15  mitaka.cloud.net mitaka
Try this link or below commands to install packstack
$sudo yum install -y centos-release-openstack-mitaka
$sudo yum update -y
$sudo yum install -y openstack-packstack
Procedure:
Start packstack with allinone. Details can be found in Lab-13:Deploying Openstack using packstack allinone
$packstack --allinone
After around 15 min you will see this message which mean installation is successful
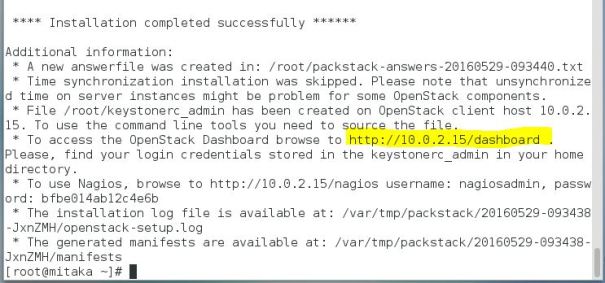
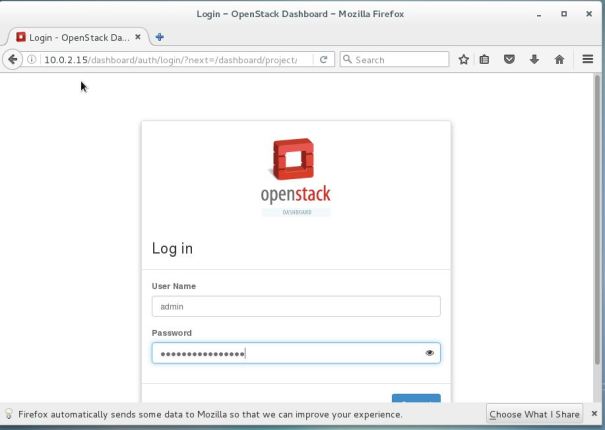
Install firefox and launch Openstack Dashboard http://10.0.2.15/dashboard
Delete router and network gui from . Try below commands to create networks and spin a Virtual Machine
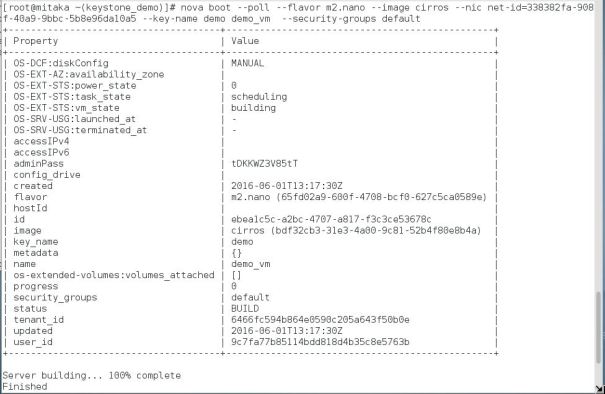
#. keystonerc_admin

#nova flavor-create m2.nano auto 128 1 1
#neutron net-create public --router:external=True

#neutron subnet-create --disable-dhcp public 172.254.209.0/24 \
--name public_subnet --allocation-pool start=172.254.209.87,end=172.254.209.95 --gateway-ip 172.254.209.126

#. keystonerc_demo

#neutron net-create demo
#neutron subnet-create --name demo_subnet \
 --dns-nameserver 8.8.8.8 demo 192.168.11.0/24

#neutron router-create pub_router
#neutron router-gateway-set pub_router public
#neutron router-interface-add pub_router demo_subnet

#ssh-keygen -f demo -t rsa -b 2048 -N ''
#nova keypair-add --pub-key demo.pub demo

#neutron security-group-rule-create --protocol icmp default
#neutron security-group-rule-create --protocol tcp \
 --port-range-min 22 --port-range-max 22 default

#neutron net-list
#nova boot --poll --flavor m2.nano --image cirros \
 --nic net-id=338382fa-908f-40a9-9bbc-5b8e96da10a5 --key-name demo demo_vm --security-groups default